
Table of Contents
- 1. Poor Surface Preparation ❌
- 2. Inadequate Welding Techniques
- 3. Choosing the Wrong Type of Liner
- 4. Ignoring Temperature and Weather Conditions
- 5. Insufficient Testing and Quality Assurance
- Case Studies: Lessons from the Field 🔗
- Comparison Table: 0.75mm Liners vs. Other Thicknesses 📊
- Statistics: The Costs of Mistakes 💸
- How to Avoid These Mistakes ✅
- FAQs: Your Top Questions Answered ❓
- Conclusion: Get It Right the First Time
Introduction: Why 0.75mm Liners? 🌍
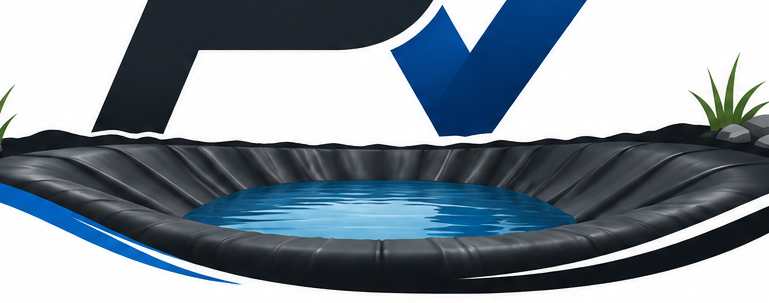
0.75mm liners are among the most popular choices for water containment projects like reservoirs, ponds, and dam liners due to their flexibility, durability, and affordability. However, improper installation can render them ineffective, leading to costly repairs or even project failure.
In this blog post, we’ll explore the common mistakes in installing 0.75mm liners, their impact, and how to avoid them. Let’s dive in!
Common Mistakes in Installing 0.75mm Liners
1. Poor Surface Preparation ❌
One of the most critical steps in installing liners is ensuring the surface is properly prepared.
Common Issues:
- Uneven surfaces with sharp rocks or debris that can puncture the liner.
- Failure to remove vegetation, roots, or other organic materials.
- Ignoring proper compaction of the soil base.
Why This Matters:
Improper surface preparation compromises the liner’s integrity, leading to leaks or tears.
How to Fix It:
- Clean thoroughly: Remove all sharp objects and organic debris.
- Use a geotextile underlay: This adds an extra layer of protection.
- Compact the soil to eliminate voids.
Pro Tip: Use a metal detector to find hidden sharp objects in the soil.
2. Inadequate Welding Techniques
Joining 0.75mm liners often involves heat welding. Mistakes in this process can cause weak seams, which are the most vulnerable points of the liner.
Common Issues:
- Improper temperature settings during welding.
- Poor alignment of liner edges.
- Lack of proper training for installers.
How to Fix It:
- Hire trained professionals with experience in liner welding.
- Use high-quality welding machines.
- Always test the seams before proceeding.
3. Choosing the Wrong Type of Liner
While 0.75mm liners are versatile, they’re not suitable for every project. Choosing the wrong liner for specific environmental or mechanical conditions can lead to failure.
Common Issues:
- Using 0.75mm liners in high-abrasion environments.
- Choosing the wrong material type (e.g., PVC vs. HDPE).
How to Fix It:
- Consult with experts to match the liner type to your project requirements.
- Use thicker liners for highly abrasive conditions.
4. Ignoring Temperature and Weather Conditions
Temperature fluctuations during installation can affect the flexibility and performance of 0.75mm liners.
Common Issues:
- Installing liners during extremely hot or cold conditions.
- Ignoring wind, which can cause improper alignment or damage during installation.
How to Fix It:
- Install liners during mild weather conditions (15-25°C is ideal).
- Use weights or clamps to prevent wind-related misalignments.
5. Insufficient Testing and Quality Assurance
Skipping quality checks during installation is a major mistake that can lead to undetected leaks or weaknesses.
Common Issues:
- Failing to conduct air pressure tests on seams.
- Neglecting visual inspections for defects.
How to Fix It:
- Perform both air pressure and vacuum testing on seams.
- Inspect the liner surface meticulously before finalizing installation.
Case Studies: Lessons from the Field 🔗
Case Study 1:
A water reservoir in Kenya failed due to sharp rocks that punctured a 0.75mm liner. The client hadn’t used a geotextile underlay. Repair costs exceeded KES 1,000,000.
Lesson: Always invest in surface preparation and protective underlays.
Case Study 2:
A fish pond in South Africa suffered leaks because welding temperatures were too high, causing the liner material to thin and weaken.
Lesson: Proper welding techniques are critical to liner durability.
Comparison Table: 0.75mm Liners vs. Other Thicknesses 📊
| Feature | 0.75mm Liner | 1.0mm Liner | 1.5mm Liner |
|---|---|---|---|
| Cost (per m²) | Low | Medium | High |
| Flexibility | High | Medium | Low |
| Durability | Moderate | High | Very High |
| Best For | Small ponds, reservoirs | Reservoirs, canals | Large dams, high-abrasion areas |
Statistics: The Costs of Mistakes 💸
- 65% of liner failures are attributed to poor surface preparation.
- Improper welding accounts for 25% of installation issues.
- Correcting a failed liner installation costs 2-3 times more than getting it right the first time.
How to Avoid These Mistakes ✅
- Hire Certified Installers: Experienced professionals reduce risks.
- Invest in Quality Materials: Use geotextiles and high-grade liners.
- Conduct Thorough Testing: Always test seams and inspect surfaces.
FAQs: Your Top Questions Answered ❓
1. Can I install 0.75mm liners myself?
Yes, but it’s recommended to hire professionals for large projects. DIY installations often lead to mistakes like improper welding or surface preparation.
2. What’s the lifespan of a 0.75mm liner?
With proper installation and maintenance, 0.75mm liners can last 10-15 years.
3. Is a 0.75mm liner suitable for high-abrasion environments?
No, thicker liners (1.0mm or 1.5mm) are better suited for such conditions.
Embedded Social Media Posts
Instagram • Twitter • LinkedIn
“A small mistake in liner installation can lead to BIG problems. Learn how to get it right the first time with our guide! [Link] #LinerInstallation #WaterStorage”
Call to Action
Ready to avoid costly mistakes and get your 0.75mm liner installation done right? Contact us today for expert advice, quality materials, and professional installation services!
TL;DR
Common Mistakes in Installing 0.75mm Liners: Poor surface prep, inadequate welding, and ignoring weather conditions can lead to costly failures. Avoid these by hiring professionals, testing thoroughly, and investing in quality materials. Read more to learn how to save time and money! 💼
Originally posted 2024-12-16 08:01:48.