
Dam liners play a critical role in water containment, whether for agricultural, industrial, or recreational purposes. The 0.5mm dam liner, known for its durability and cost-effectiveness, has become a popular choice among farmers, engineers, and water managers. This comprehensive guide will take you through the installation process while incorporating valuable tips, related keywords, and statistics to help you make informed decisions.
Why Choose a 0.5mm Dam Liner?
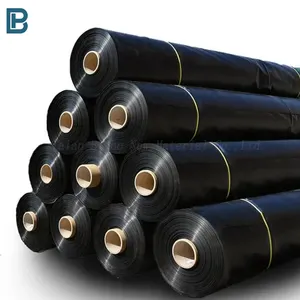
Durability and Flexibility:
The 0.5mm thickness strikes the perfect balance between durability and flexibility. It can withstand regular wear and tear while adapting to the contours of your dam, pond, or reservoir.
Cost-Effectiveness:
Compared to thicker options, 0.5mm liners are budget-friendly while maintaining performance, making them a popular choice for small-to-medium-scale projects.
Eco-Friendly and Safe Materials:
Most dam liners are made from eco-friendly materials such as HDPE (High-Density Polyethylene) or LDPE (Low-Density Polyethylene). These materials are safe for aquatic life and prevent water seepage effectively.
Step-by-Step Guide to Installing a 0.5mm Dam Liner
1. Site Preparation
Before installation, ensure the site is clean, level, and free of sharp objects that could puncture the liner.
- Clear Vegetation: Remove all grass, shrubs, and tree roots from the site.
- Excavation and Leveling: Dig to the required depth and level the base and sides of the dam or pond. Compact the soil to prevent erosion.
- Check for Debris: Inspect for stones, sticks, and other sharp objects. Lay a layer of sand or geotextile underlayment for added protection.
Pro Tip: Use a geotextile underlay if the base soil has irregularities to enhance the longevity of the liner.
2. Measuring and Cutting the Liner
Accurate measurement ensures proper coverage and minimizes waste.
- Measure the Dam Dimensions: Include length, width, and depth while accounting for overlaps and anchor trenches.
- Cut the Liner: Lay the liner on a flat surface and cut it according to the dimensions. Always allow an extra 10-20% for overlaps and unforeseen adjustments.
3. Placing the Liner
Positioning the liner correctly is crucial for a successful installation.
- Unroll Carefully: Unroll the liner across the dam starting from one side. Use weights or sandbags to prevent movement during placement.
- Smooth Out Wrinkles: Stretch and smooth the liner to eliminate wrinkles. This ensures even water pressure distribution.
4. Sealing the Edges
Proper sealing prevents water leakage and enhances durability.
- Anchor Trenches: Dig trenches around the perimeter to secure the edges. Place the liner inside and backfill with soil.
- Welding or Adhesives: For larger projects, weld or use adhesives to join liner seams securely. Ensure a tight seal to avoid seepage.
| Sealing Technique | Advantages | Recommended For |
|---|---|---|
| Thermal Welding | Strong, waterproof joints | Large-scale installations |
| Adhesives | Easy and quick application | Small-to-medium installations |
5. Filling the Dam
After installation, gradually fill the dam with water while monitoring the liner’s position. Ensure no movement or stretching occurs during this phase.
Key Features of a Properly Installed Dam Liner
- Zero Leakage: The liner prevents water seepage into the soil.
- UV Resistance: High-quality liners resist degradation from sunlight exposure.
- Flexibility: Adapts to the dam’s shape and withstands pressure changes.
Comparing 0.5mm Dam Liners to Other Thicknesses
| Liner Thickness | Best Use Cases | Durability | Cost |
|---|---|---|---|
| 0.3mm | Small ponds, light use | Moderate | Low |
| 0.5mm | Medium dams, agricultural use | High | Moderate |
| 1.0mm | Industrial applications | Very High | High |
According to industry experts, 0.5mm liners are ideal for 70% of agricultural and recreational projects, providing a balance between performance and cost.
Benefits of Using a 0.5mm Dam Liner
- Water Conservation:
A properly installed liner can reduce water loss by up to 90%. This is especially critical in arid regions. - Improved Efficiency in Irrigation Systems:
A lined dam ensures consistent water availability, improving irrigation efficiency. - Long Lifespan:
With proper maintenance, 0.5mm liners can last 10–20 years. - Eco-Friendly:
Modern liners are manufactured with minimal environmental impact and are often recyclable.
Tips for Maintaining Your 0.5mm Dam Liner
- Regular Inspections: Check for signs of wear, punctures, or UV damage.
- Cleaning: Remove algae or debris that could degrade the liner.
- Repairs: Use patch kits or adhesive solutions for minor damage.
- Water Levels: Avoid overfilling or drying out the dam, which could stress the liner.
Frequently Asked Questions About 0.5mm Dam Liners
Q: What materials are 0.5mm dam liners made of?
A: They are typically made of HDPE, LDPE, or PVC, which offer excellent waterproofing and durability.
Q: How much does a 0.5mm dam liner cost?
A: Prices vary based on material and size, averaging between $2 and $5 per square meter.
Q: Can I install the liner myself?
A: Yes, but professional installation is recommended for large-scale projects to ensure proper placement and sealing.
Protect Your Water Resources Today
Investing in a high-quality 0.5mm dam liner is essential for effective water management. Whether you’re looking to enhance your farm’s irrigation system, create a sustainable aquaculture pond, or build a recreational dam, the right liner ensures durability and efficiency.
Get your customized quote today!
Contact us at YourCompany.com or call [Your Number] for expert advice and premium-quality dam liners.
Summary
A 0.5mm dam liner is an affordable, durable, and versatile solution for water containment needs. By following this guide, you can ensure a smooth installation process and maximize the liner’s lifespan. Regular maintenance and proper care will help you reap the benefits of this investment for years to come.
Would you like us to help you with liner selection or provide a custom installation plan? Let us know!
Originally posted 2024-11-27 14:06:39.